We are currently able to support Apple Pay via ACI for CopyandPay, Server-to-Server, and the mobile SDK.
Please Note - ApplePay is not available via Shopify.
We also support Apple Pay for Checkout and the setup for that is done in our own Apple Developer Account, the console, and the BIP as explained here.
The steps to configure Apple Pay for the mobile SDK are already on the official ACI documentation; this guide is just an extension to show how to configure it for the web (CopyandPay and Server-to-Server) as well.
To configure Apple Pay for a new merchant, we need to create a Payment Processing Certificate and a Merchant Identity Certificate from the BIP. We either need to have access to their Apple Developer Account or walk them through the process; it should take less than five minutes to set up.
A screen recording (loom) covering the whole setup process is available here.
Registering the Merchant ID
Inside the Apple Developer Account, navigate to Certificates, IDs & Profiles > Identifiers
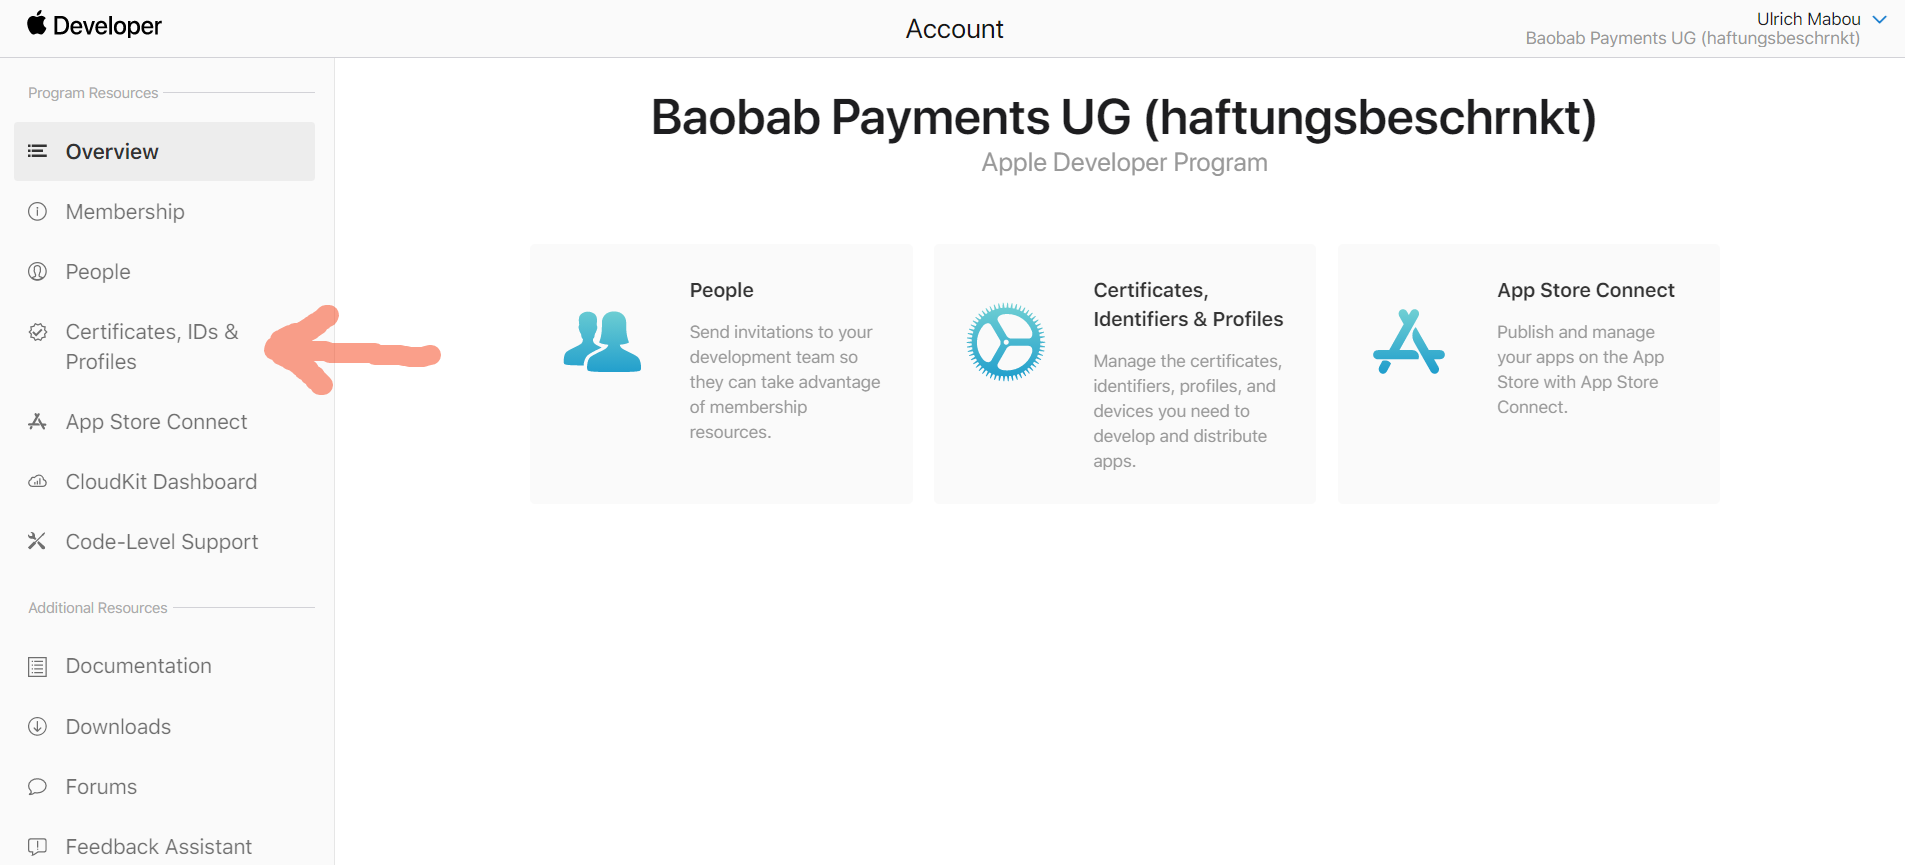
Then click the + or Register and App ID button 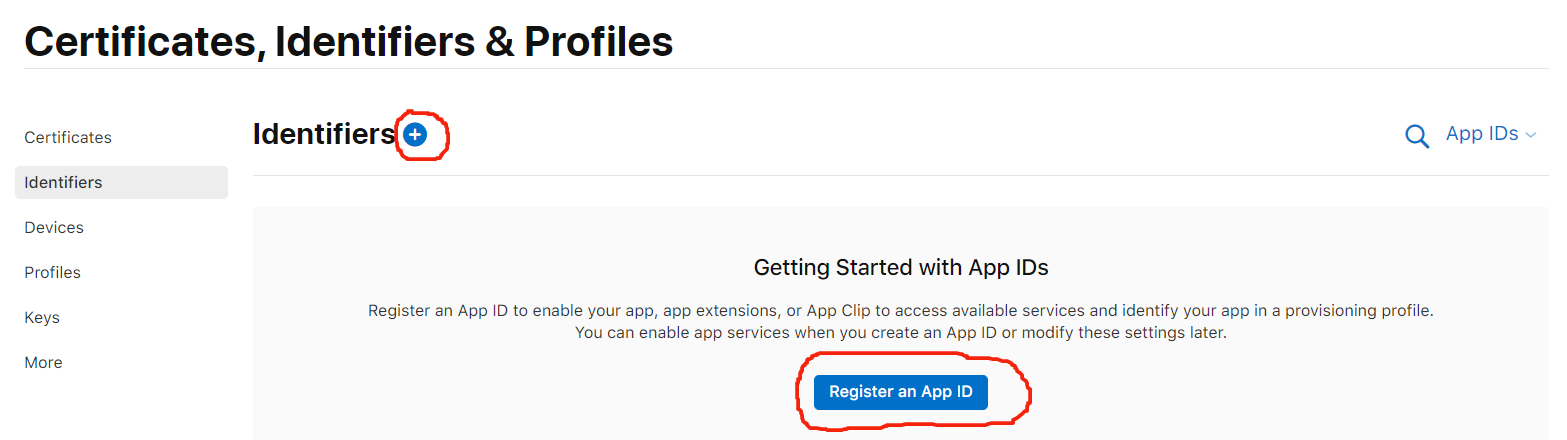
Scroll down to select Merchant IDs, then click on the Continue button on top.

Provide a Description (i.e DEMO Peach) and an Identifier (i.e merchant.com.peachpayments.demo) and click on Register.

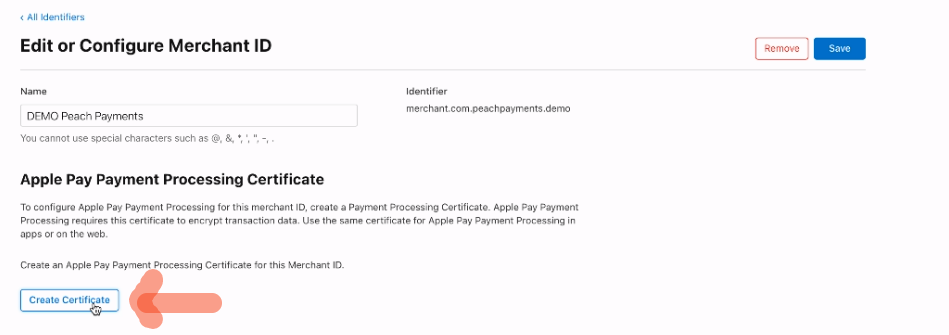
Configuring Apple Pay Payment Processing
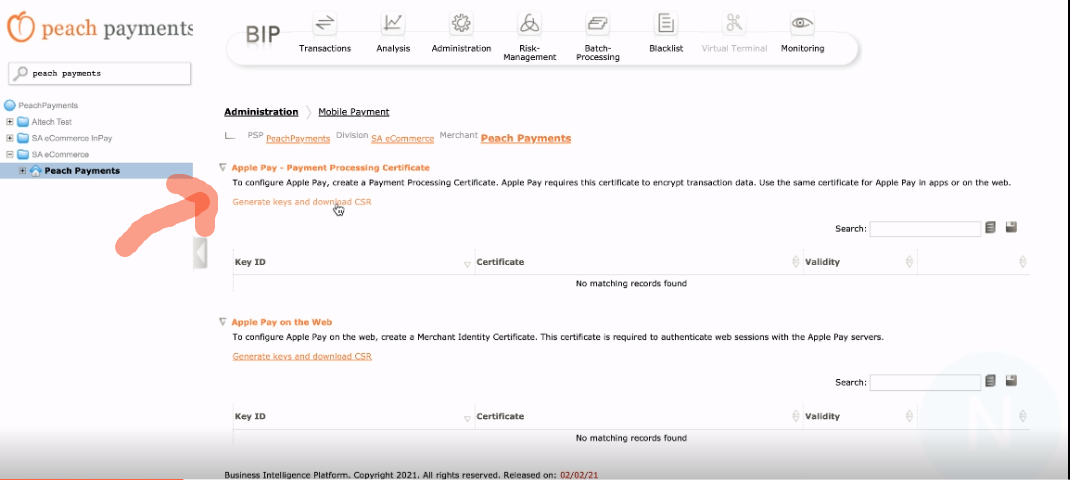
Once the merchant ID is registered, we can proceed to create the Payment Processing Certificate.
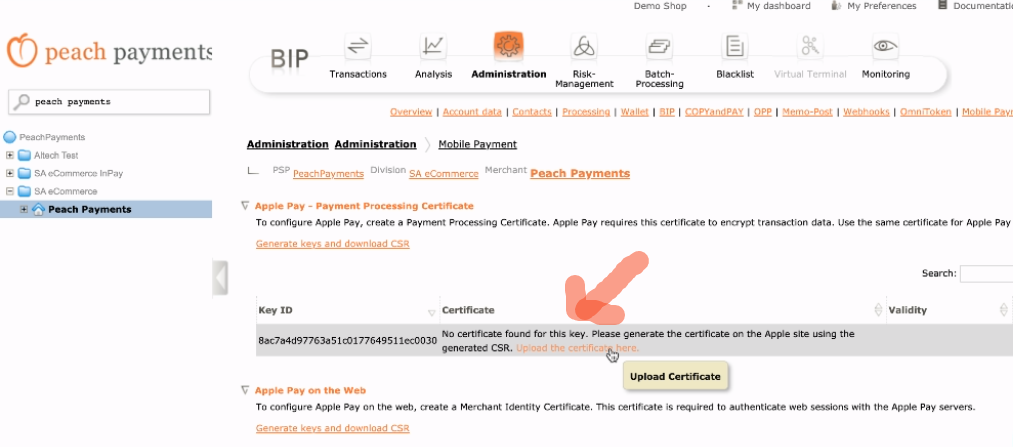
Inside the BIP, navigate to the merchant account > Administration > Mobile Payments, then click on Generate keys and download CSR under Apple Pay - Payment Processing Certificate.
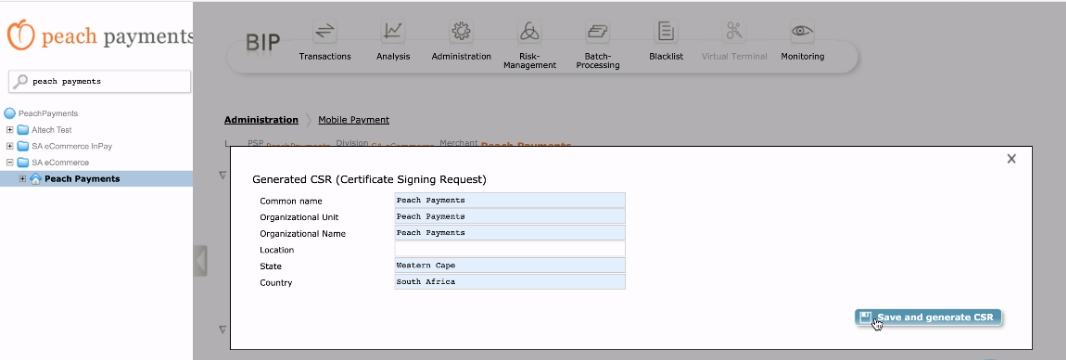
Click on OK on the pop-up, fill in the form and click on Save and generate CSR, then click on Download to download the CSR.
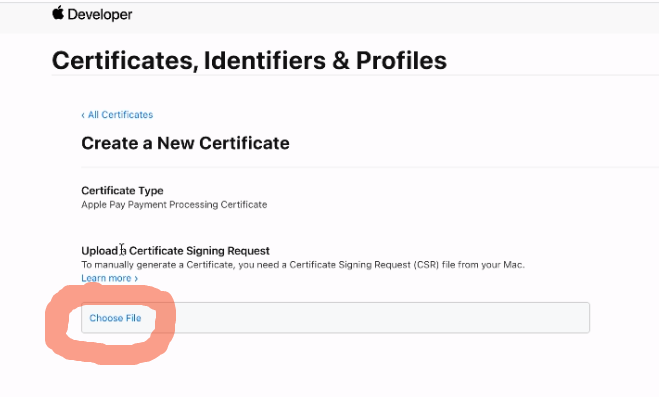
Navigate back to the Apple Developer Account, click on Create Certificate under Apple Pay Payment Processing Certificate
Proceed and upload the downloaded CSR, then click on Continue.
Download the generated certificate.
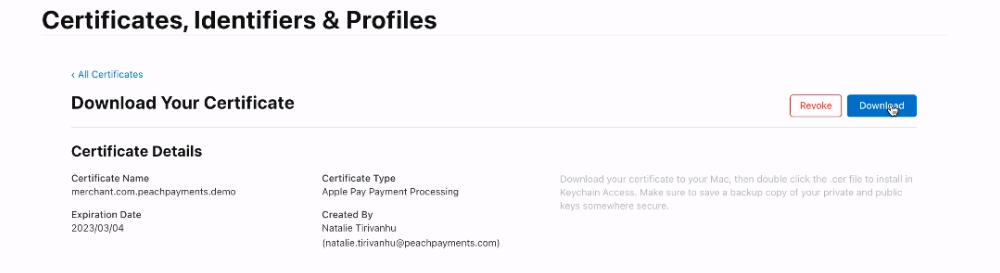
Navigate back to the BIP and upload the certificate under Apple Pay - Payment Processing Certificate.
Creating the Apple Pay Merchant Identity Certificate
The steps for creating the Apple Pay Merchant Identity Certificate are almost identical to the steps for creating the Apple Pay Payment Processing Certificate above:
- Inside the BIP, navigate to the merchant account > Administration > Mobile Payments, then click on Generate keys and download CSR under Apple Pay on the Web.
- Follow the steps to download the CSR as above.
- Navigate back to the Apple Developer Account, click on Create Certificate under Apple Pay Merchant Identity Certificate.
- Upload the CSR and download the certificate.
- Then navigate back to the BIP and upload the certificate under Apple Pay on the Web.
That is it for the setup. The merchant account should now be able to process Apple Pay for CopyandPay, Server-to-Server and the mobile SDK.
For CopyandPay for example, enabling Apple Pay simply requires to add "APPLEPAY" as a payment brand when invoking the widget:
<script src="https://eu-test.oppwa.com/v1/paymentWidgets.js?checkoutId=0B65AB99CC6D0CBCD35012397639433C.uat01-vm-tx03"></script>

<form action="https://example.com" class="paymentWidgets" data-brands="VISA MASTER APPLEPAY"></form>
Was this article helpful?
That’s Great!
Thank you for your feedback
Sorry! We couldn't be helpful
Thank you for your feedback
Feedback sent
We appreciate your effort and will try to fix the article
Still can't find what you're looking for?
Our support team is here to help you with any questions.
Submit a Ticket